Inside a TPMS sensor: a broken tyre sensor and a day at the workshop
What is inside a TPMS sensor, what its FCC filing reveals, and what happened when the sensor in my tyre broke and I spent a day at the workshop.
So in the first blog post, we have seen what a tyre pressure monitoring system (TPMS) is and how it helps prolong the life of your car tyres and improve safety. We have also seen that there are two types of systems: direct, which uses a sensor in the tyre, and indirect, which does not add any extra hardware. Since my car uses direct TPMS, we will explore this going forward.
So how do you access this sensor if you wanna take a look at it? You can’t! This sensor is hidden behind the air valve stem. From the outside, you can’t really tell if your car even has the sensor. As an example, the image below shows how the sensor is mounted inside the wheel.
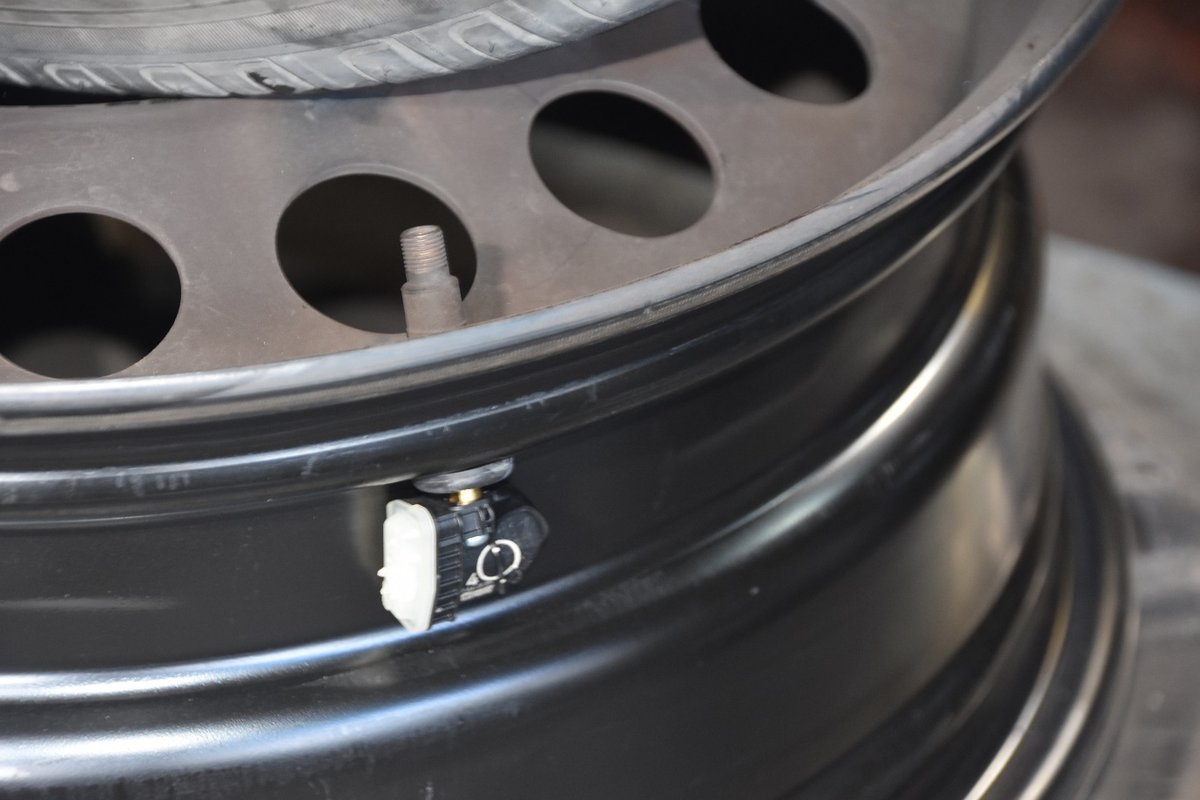 The sensor sits on the inside of the rim, at the back of the valve stem.
Why behind the valve stem? Because the valve is the only part of the wheel that already goes through the rim and is held tightly in place. So the sensor just bolts onto the back of it. No extra holes, no glue, and it stays fixed even when the wheel is spinning at high speed.
The only way you can access them is when you go to the workshop and get the tyre removed from the rim. I actually did this and sat with the workshop personnel for a complete day to get one of my broken sensors fixed. Let me start with that story.
It was fine. Until it wasn’t.
The sensor was just a small part hidden inside my tyre that I never thought about. Then one day, I had a leaky tyre and went to a cheap roadside shop to get it fixed. The person there told me it was not a puncture. The valve had developed cracks around it, and that was causing the leak. So he suggested replacing it with a new one.
Back then, I did not know anything about TPMS sensors, let alone that they are attached to the valve. So the naive me asked him to go ahead. He did not know about the sensor either, and he simply ripped off the old valve. Since the sensor is attached to the back of the valve, it got torn off along with it and was left rolling around loose inside my tyre.
I went on with my life for a few days. Then this warning popped up on my dashboard: “Check Tyre Pressure Monitoring Syst.” It was not telling me a tyre was low on air. It was telling me something was wrong with the system itself.
When the tyre was taken off the rim at the workshop, the damage was clear. Compare it with the image at the start of this post, where the sensor sits neatly at the back of the valve stem. In mine, there was just the plain valve from the roadside shop, with no sensor behind it. The sensor itself was lying loose inside the tyre.
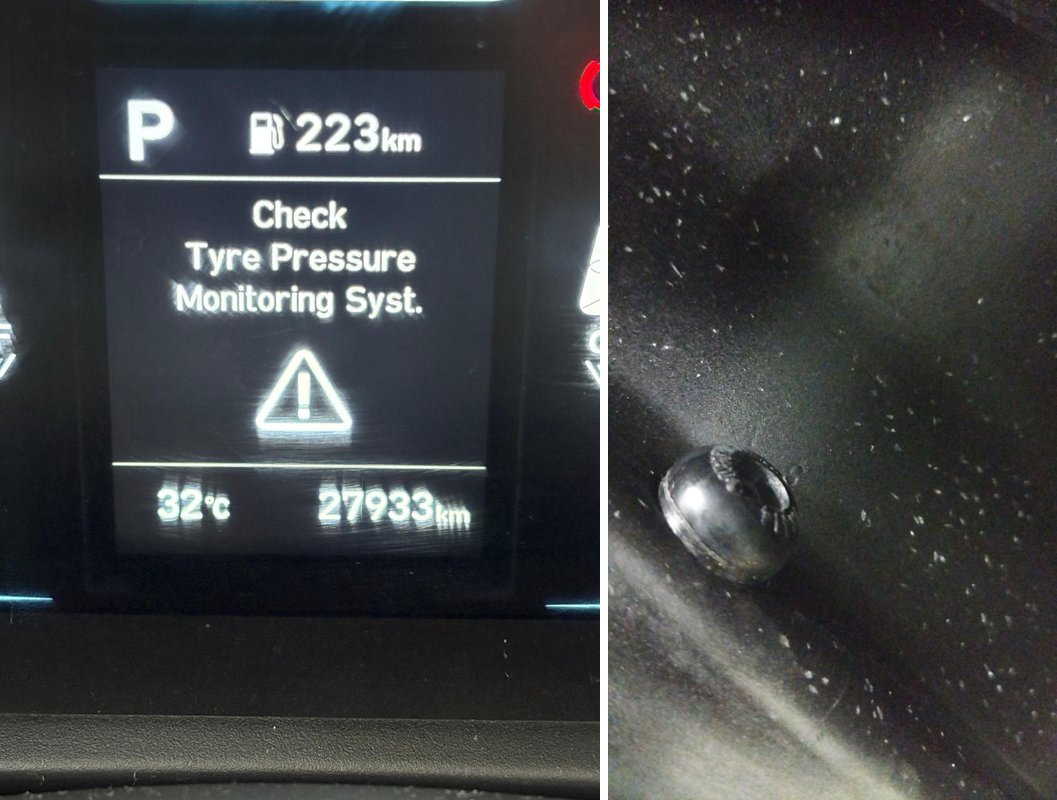 Left: the warning on my dashboard. Right: inside my rim, a plain valve and no sensor.
As we saw in the first post, the battery is sealed inside the sensor, so there is no fixing a broken one. You replace it. And it is not cheap. The quote for the original sensor, along with its screw and valve stem, came to ₹4,826. That is a lot of money for something that fits in the palm of your hand.
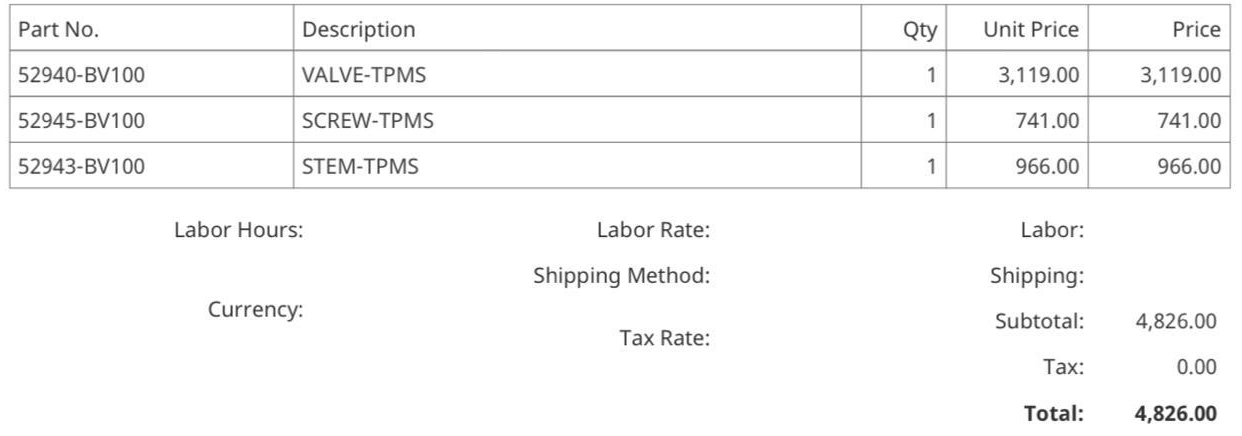 The quote for replacing my sensor with the original part.
A day out in the workshop
Replacing a TPMS sensor is not as simple as it sounds. The wheel has to come off the car, and the tyre has to come off the rim. Then the old valve and sensor are removed, the new one is fitted, and the tyre goes back on and gets inflated. But that is not the end. The car does not know about the new sensor yet, and it will simply ignore it until it is told. So the workshop plugged a tool into the car’s OBD port and registered the new sensor’s ID for that wheel.
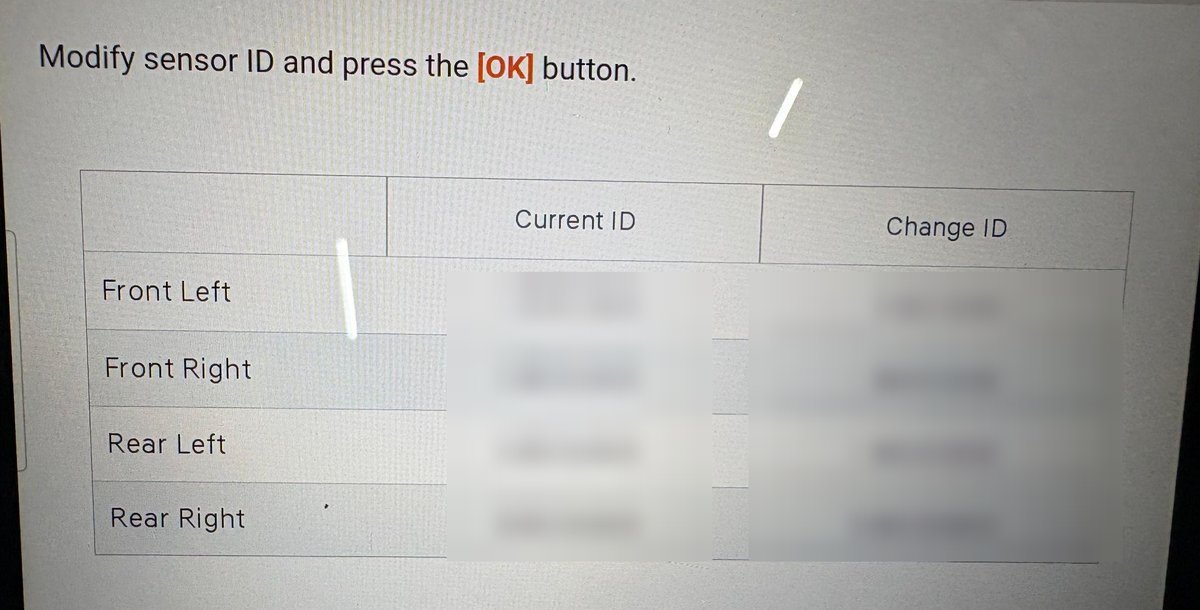 The workshop’s OBD tool showing the sensor ID registered for each wheel. IDs blurred.
This screen shows the ID of every sensor in my car, and more importantly, which wheel each one belongs to. These are the same IDs that are printed on the sensors, and the same IDs each sensor sends out over the air in every packet.
The interesting part is that I already knew this. Before the workshop visit, I had worked out which ID belongs to which tyre for my original sensors, just by listening to the radio signals from my car and doing a few experiments. The OBD tool matched it exactly. How I did that is a story for a later post in this series.
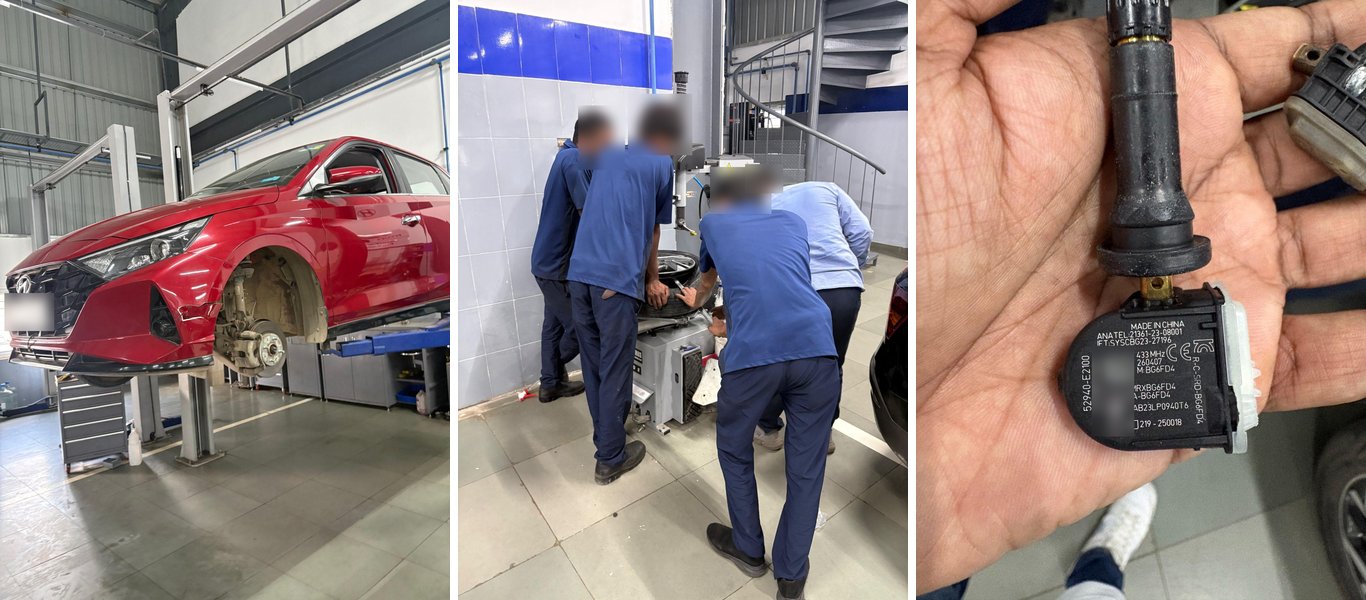 A day out in the workshop: my i20 on the lift, the crew at work, and the new sensor. Sensor ID blurred.
I sat there with them for the whole day, watching them work and taking photos. And that is how I got my hands on both the old and the new sensor. That is where the fun begins.
A TPMS sensor
The sensor is a small, lightweight device that looks like the one in the image below. This is the replacement sensor that was fitted in my car recently. You will be surprised how light this sensor actually is.
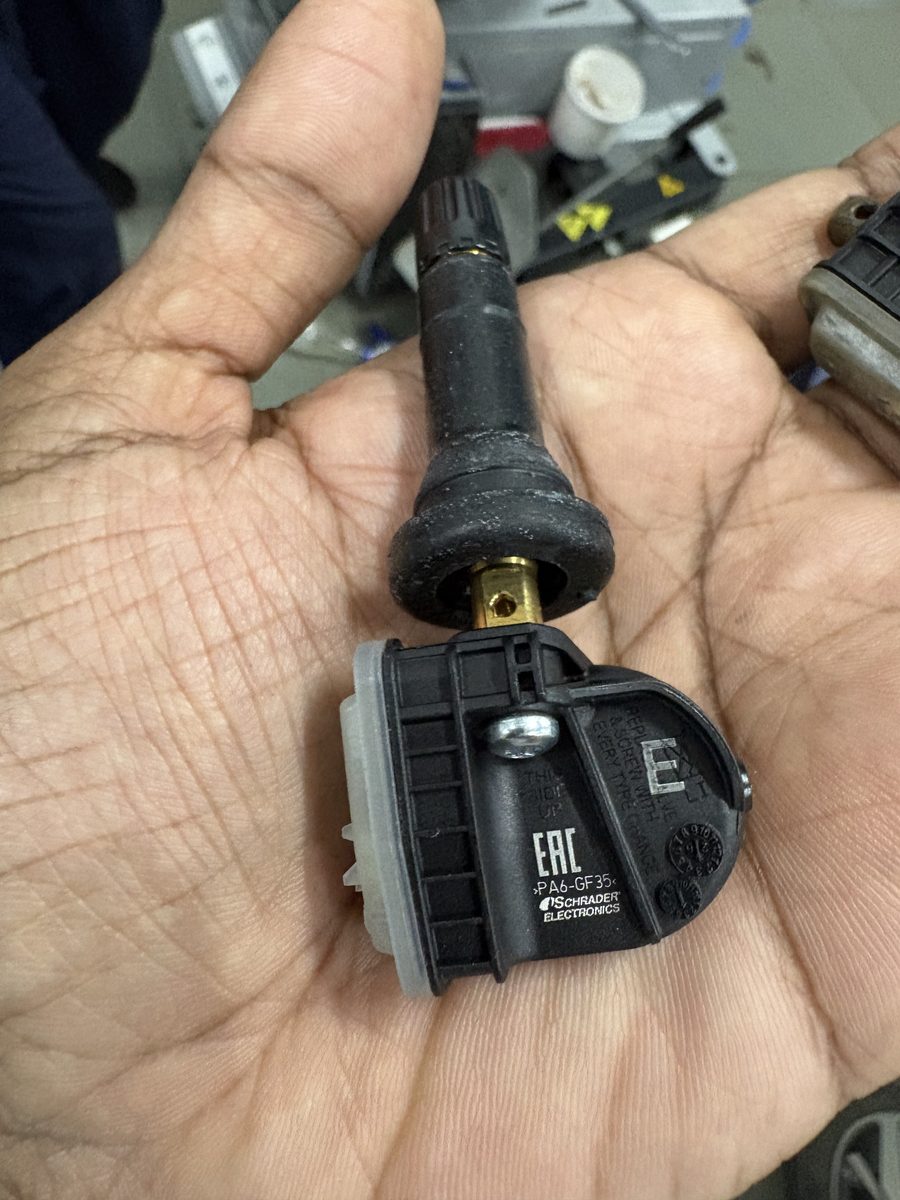 The new sensor, with the valve stem attached, made by Schrader Electronics.
As we saw in the first blog post, the sensor measures pressure and temperature. It also has an accelerometer inside that detects when the tyre is moving. But how do we know it has all of this? Some cars display pressure and temperature, but most cars only display pressure.
The two sensors I brought back from the workshop gave me an important clue. Both of them have an FCC ID printed on them.
FCC stands for the Federal Communications Commission. It is the US agency that regulates anything that uses radio. Any device that transmits radio signals has to be tested and certified by the FCC before it can be sold in the US, and most of the test reports are made public. My car was bought in India, but the same sensor is sold all over the world, so it carries an FCC ID too. This FCC ID is all we need to dig up some interesting details.
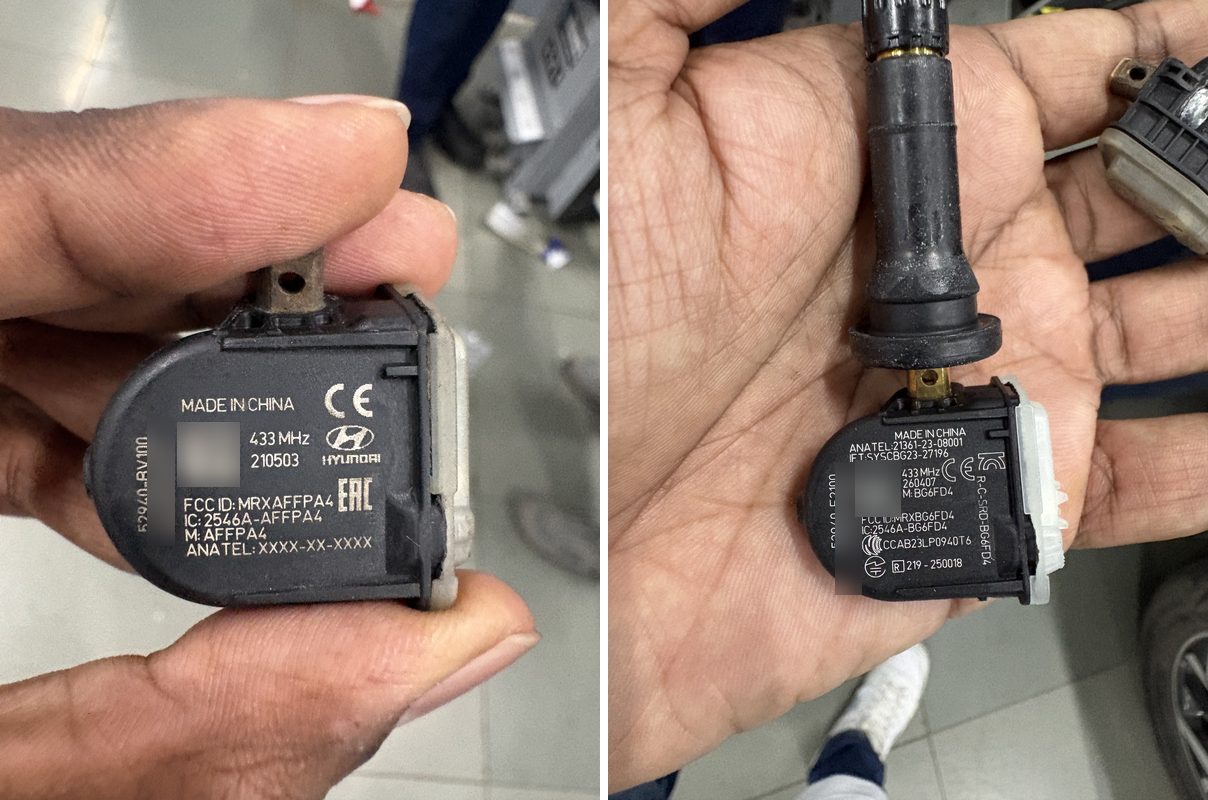 Left: my broken sensor (FCC ID MRXAFFPA4). Right: the new one (FCC ID MRXBG6FD4). Sensor IDs blurred.
Interestingly, the two sensors don’t even have the same FCC ID. The old one is MRXAFFPA4 and the new one is MRXBG6FD4. The part numbers are different too (52940-BV100 vs 52940-E2100). So Hyundai did not put back the same sensor. It fitted a different model as the replacement.
Reading the label
Take a closer look at the label on the new sensor. Apart from the FCC ID, there is a lot printed on it. 433 MHz is the frequency it transmits on, which we saw in the first post. The line starting with ID is the sensor’s own ID. It is unique to each sensor and goes out in every packet it sends, so the car knows which tyre the reading came from. Since the packets are not encrypted, anyone listening could use this ID to recognise my car, so, for obvious reasons, I blurred it. We’ll come back to this ID later in the series.
The rest of the label is approval marks from different countries: CE for Europe, IC for Canada, ANATEL for Brazil, IFT for Mexico, EAC for Russia and its neighbours, KC for Korea, and a couple more for Taiwan and Japan. The same small sensor is certified to be sold almost everywhere.
FCC filings. Our gold mine for information
So what can you get from just an FCC ID? Quite a lot. When a company applies for FCC approval, it has to submit a bunch of documents: test reports, photos of the device, the label and a description of how it works. All of this goes into a public database, and you can look it up with just the FCC ID. I used fccid.io, which makes the FCC database much easier to search.
Here are the filings for my two sensors:
The first surprise is who actually makes them. It’s not Hyundai. Both sensors are made by Schrader Electronics, a company from Northern Ireland that makes TPMS sensors for a lot of carmakers. The MRX at the start of both FCC IDs is Schrader’s code.
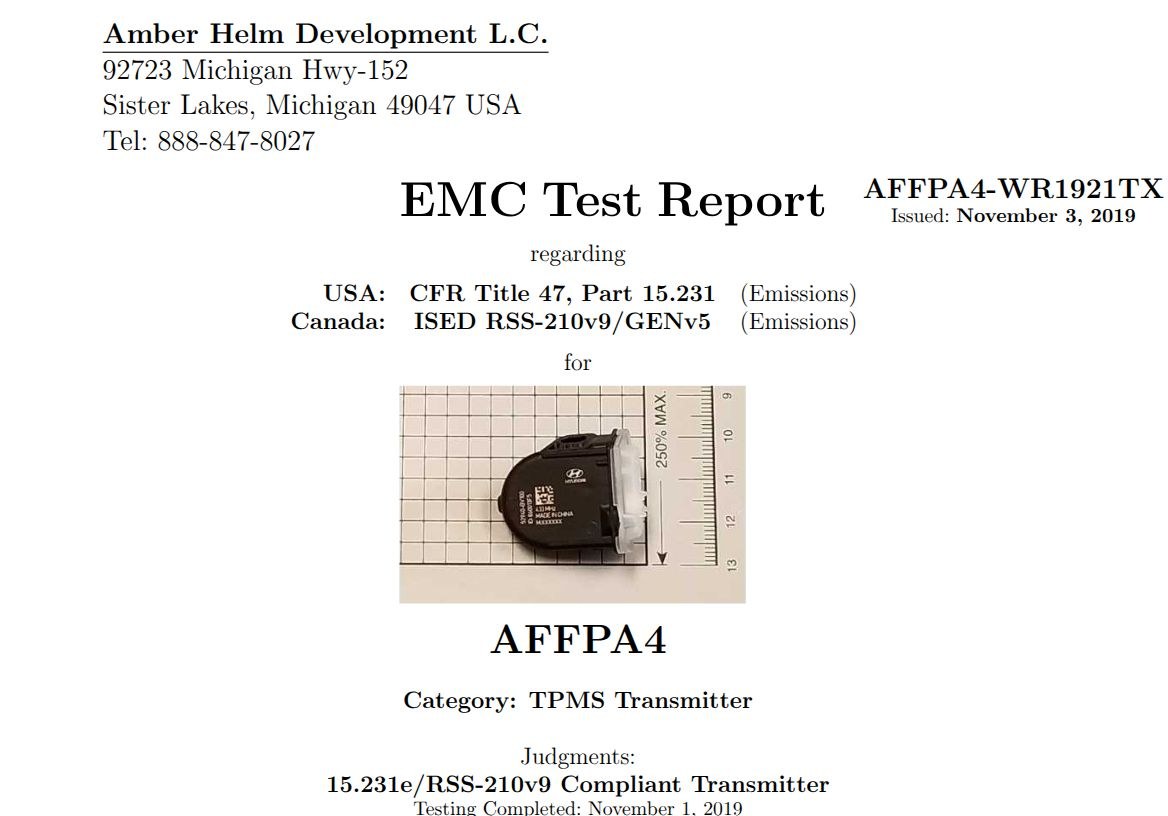 The cover page of the FCC test report for my old sensor. Image: FCC test report, MRXAFFPA4.
The test report is where it gets interesting. It is done by an independent test lab, and it confirms the sensor transmits at 433.92 MHz. The sensor is approved under an FCC rule, Part 15.231(e), which allows devices to send data periodically, as long as each transmission lasts no more than one second and the gap between two transmissions is at least 30 times as long, and never less than 10 seconds. That is exactly what a TPMS sensor does. Send a short burst, go quiet, repeat.
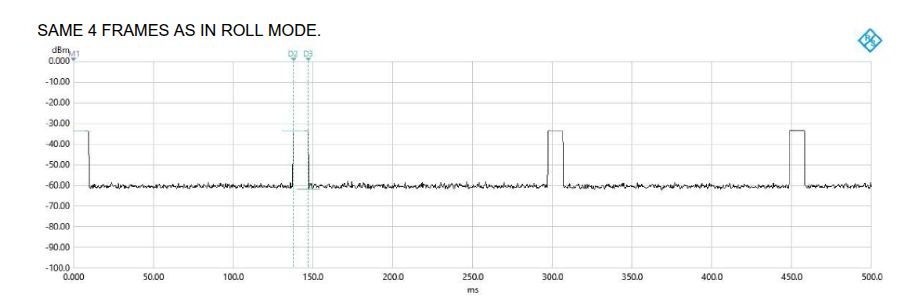 The sensor’s transmission captured by the test lab: four short frames in about half a second. Image: FCC test report, MRXAFFPA4.
The report even tells us how often. While driving, my old sensor sends 4 frames, each about 9.3 ms long, and then goes quiet for at least 20 seconds before it sends the next set.
But not everything is public. The documents that describe how the data is actually encoded in the radio signal are kept confidential. So the filings tell us what the sensor transmits, but not what it is saying. Figuring that out is something we will do later in this series.
What’s inside?
The FCC test report also has photos of the sensor taken apart. And there is not much inside. Just a tiny circuit board and a coin cell battery.
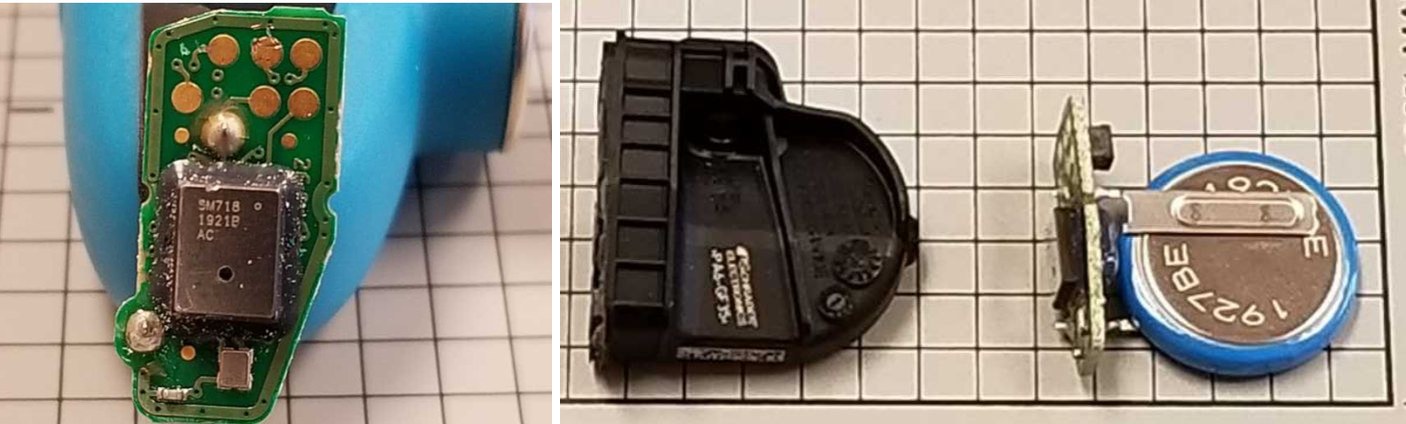 Inside the old sensor: the circuit board (left) and the opened housing with the board and battery (right). Image: FCC test report, MRXAFFPA4.
Most of the work is done by the one big chip in the middle of the board. TPMS chips like this usually pack everything into a single custom package: the pressure sensor, a temperature sensor, an accelerometer, a small microcontroller and the radio transmitter. If you look closely, you can see a tiny hole on top of the chip. That is where the air from the tyre gets in to reach the pressure sensor.
The chip also has a low frequency (LF) receiver. That is how the tool at the workshop can wake the sensor up and ask it to send its data. The test report mentions this too, as the “LF Activated LEARN” mode.
And then there is the battery. It is welded directly to the circuit board with metal tabs. So when the battery dies after 5-10 years, you cannot just swap it out. You replace the whole sensor.
To make the battery last that long, the sensor spends most of its time doing nothing. This is where the accelerometer helps. When the car is parked, the sensor knows the wheel is not spinning, so it stays quiet or transmits very rarely. Once the wheel starts rolling, it wakes up and starts sending its 4 frames every 20 seconds or so, like we saw in the test report.
My old sensor did exactly this for about five years. It quietly sent its little packets from inside my front left tyre every time I drove, without me ever thinking about it. Until the day a roadside mechanic ripped it off along with the valve.
Coming up in this series:
- Why the sensor measures temperature
- Collecting this data using cheap hardware and doing all kinds of data analysis on it
- Decoding the radio packets from my car, and how I worked out which sensor ID belongs to which tyre
Stay tuned.